Showing posts with label chemical free. Show all posts

Sunday, February 26, 2017

Seed Spacing in the Home Garden

Forget everything you think you know about seed spacing. In the home garden we can easily double or triple our yields by giving up on planting our garden according to the guides on the back of our seed packets. Those guides are great for certain applications. But let's be clear, that isn't in the home garden. That's because those seed spacing guides are designed for large scale farming where seeds are planted in perfect rows because it makes mechanical harvesting easier. Row spacing is dictated so that specialized tractors can span several rows and their large tires can fit neatly between rows. In the home garden, we aren't using specialized equipment to harvest, so why are we even planting in rows? Take a look at how much we can gain with our carrots, spinach, onions, and cabbage when we give up planting in rows:


If we plant in rows, using traditional spacing, yields of these common vegetables is relatively low in a 4'x4' bed. At this level of production, it's no wonder so many home gardener's say it's not worth it. However, if we discard planting in neat rows a foot apart, we can produce as much as 3 times the yield in the same space! And since we're working in a 4 foot raised bed, we don't need rows to walk (or run equipment) through; we can reach those plants in the center perfectly well.

Lets also not forget, we can plant even more if we intend to harvest some young plants. Onions and spinach in particular can be planted at twice the rate shown above, and harvest every other plant for eating when young, allowing those left to grow to maturity.


Notice on the left the already more than tripled production when we stop planting in rows, but we don't need to stop there. Because young onions and spinach are so much smaller than mature plants, they can be planted with only half the distance between plants. Then, as they mature we can selectively harvest as shown by the outlines in the right picture to allow those remaining plants enough space to grow to maturity.

The effect of this type of planting is two fold. First, it allows us to have twice as many plants in the same amount of space, effectively doubling our harvest. Second, because the plants are spaced much closer when small they will quickly shadow any weeds that might try to grow between plants preventing them from taking root thus decreasing the need for weeding.


So many home gardeners find themselves plagued with low yields and heavy weeding. That's because the traditional methods of planting seeds aren't designed for the home garden. When we rethink how we plant and harvest our garden we can double, or even more than triple the harvest without a need for increased garden beds. And in the case of spinach and onions, we can reap more than 5x the produce by interspersing our baby spinach and green onions with those plants we intend to allow to grow to maturity. And we can do all this while decreasing the time invested weeding our beds. It doesn't get any better than that!

Let's get planting!
Nicole

Sunday, February 5, 2017

Starting Seed in February

It's just about a week into February, and my garden planning is in full swing. Depending on your plant hardiness zone (which you can find here) it's time to start sowing seeds indoors, or even directly outside under cover! If you're in zone 5-6, this guide should be just about right for you! You'll have to adjust by a week or two according to your exact last frost date. Ours is May 15th just for reference.


Some of the earliest seed you should be starting indoors (or out) is onion. For us, the first two weeks of February is golden. Planting onions later is not only possible, but encouraged, but it's this first planting that you'll leave in the garden all summer long to form large beautiful onion bulbs. Any bulb forming onion variety will work, but I prefer an open pollinated seed for reasons I'll discuss later. Also, ensure the variety you're getting is of the right day-length, which I'll also discuss later, but basically, northern states get long-day and southern states get short-day.

For starting onion indoors, just dampen a 6" pot of rich soul and sprinkle seeds in generously. Don't worry too much about crowding at this point. Onion roots are very thick and tough and will separate well in several weeks for transplanting even when crowded.  Keep the top layer of soil moist until the seeds sprout and then water only as needed until it's time for transplant.

After onions, find yourself a nice cold hardy variety of lettuce. Plant these in mid-February so they're ready for planting outside in April (or March under a cold-frame). Since these will be inside for a little while, I find it's best to plant them directly into 4" pots. Of course you can plant in starters, and then transplant later, but why bother? Just like onions, keep the soil misted with water until the seeds sprout, then water as necessary. Once the seeds are well established, pinch or snip off all but the strongest seedling in each pot; pull them, and you risk pulling them all!

Once my lettuce is well established, I start in on my spinach. It has basically the same care needs as lettuce with one notable exception: spinach does not tolerate transplant all that well, so always use a larger pot to avoid excess root disturbances. Just like lettuces, these seedlings can go outside in mid March under a cold frame, or in April unprotected. Contrary to what you might expect from seemingly delicate greens, they thrive in the cold and have a much sweeter taste and crunchier texture when grown before the heat of summer sets in.

Just remember when starting your seeds, that these are my personal start dates, and are good for those living in zones 5 and 6 with an average last frost date around May 15th. You'll need to adjust accordingly if you're in a significantly warmer or cooler climate.

#AtHomeWithNicole

Tuesday, April 12, 2016

Seedlings

I hope you've got your seeds started!  If not, it's okay - do it now while there's still just a little bit of time.  But this truly is your last chance.


This year, I'm only starting tomatoes and lavender from seeds.  The tomatoes I started a week or 2 ago, and the lavender I started a month ago.  Oh boy, do those lavender seeds take a long time to sprout.  After about 3 weeks, just when I'd assumed I'd killed them and they weren't going to sprout, I saw the first tiny little green bud.  Several days went by and it was still a tiny bud.  After a week, I could finally see a stem and leaf.  And even now, they've been sprouted for well over a week, maybe even 2 weeks, and this is all I've got:


Let me know if you've got any secrets I don't know about to get lavender going!

I justy got in my first onion bulbs and my horseradish has sprouted, but we'll discuss that next time.

Happy sprouting,
Nicole

Sunday, March 6, 2016

Surviving School Snacks

My middle daughter started Kindergarten this fall, and it was requested that she bring a small snack in each day.  Sounds easy enough, right?  I mean, she had a small afternoon snack at home every day, so sending one in should be no problem. 

Yea...  I found out pretty quickly how easy it is to fall into the trap of sending high calorie, low nutrition snacks based on either carbs and salt, or sugar.  These snacks are so easy, because it's what they sell individually packaged in every grocery store.

Determined to find a better alternative, I've come up with some great options.  For starters, don't ditch those store bought snacks all together - there's a reason they're so popular - because kids love them!  This is especially important for picky eaters.  We want our kids to eat healthy snacks, but what good does it do them to send the most nutritious snack with them if it ends up in the trash?  If your child will only eat applesauce and cheese crackers, make sure you're getting no sugar added applesauce, and try cheese crackers with peanut butter for a bit of protein.

Here's how we've managed to survive school snacks:


1. Invest in a small insulated cooler pack, and reusable ice pack - like the kind used for baby bottles.  Keep it small to reduce the bulk in their backpack.  Having the availability to keep food chilled until snack time means you can pack things like yogurt, cottage cheese, sliced fruit and veggies, or cheese
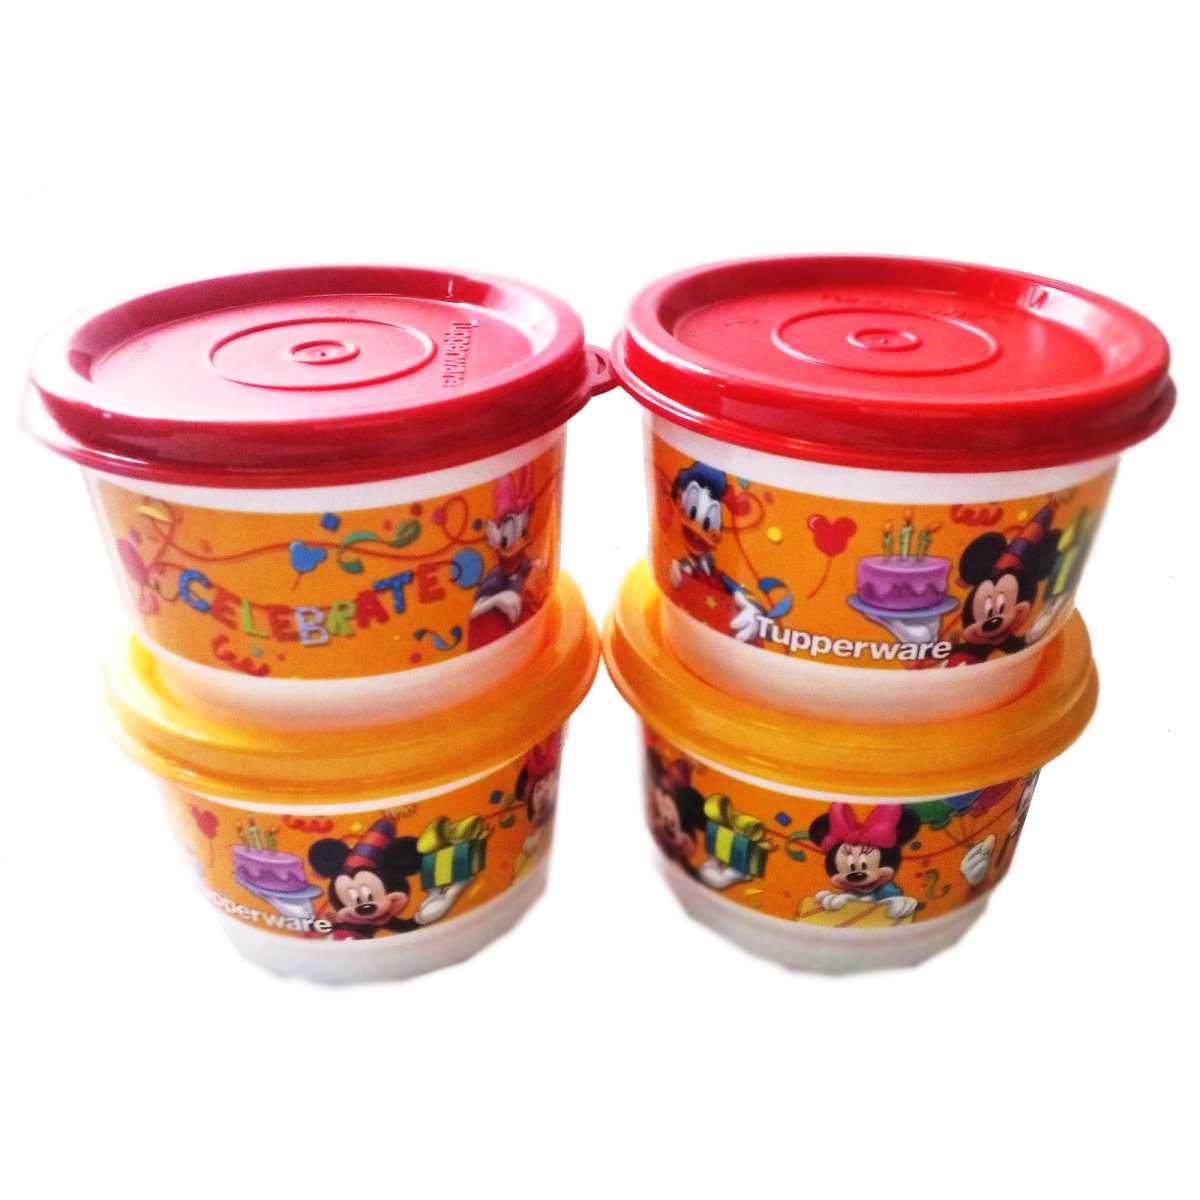
2. Those prepackaged little portions are so unbelievably expensive, and while buying in bulk and using zip top snack size bags might seem like a perfect solution - we found that most foods you'd want to put in them ended up crushed and undesirable.  We invested in reusable cups with lids (that were like $2 for a 6 pack) and it's allowed me to save money by buying large quantities of foods like crackers, nuts, berries, chips, and even breakfast cereal and divide them up. 


3. Don't be afraid to send veggies.  Baby carrots, celery, cucumber sticks, bell pepper slices, and grape tomatoes all hold up well during transport.  If your child really needs ranch, you can squirt some in the bottom of your Tupperware, then put your veggie sticks in and close it up.  But skip the ranch if you can get away with it.

4. This may seem silly, but talk to your child about snacks. Thanks in part to changing dietary standards in schools, your child will likely spend a little bit of time talking about healthy eating in school.  Use this to your advantage by asking her what healthy snacks are her favorites, what healthy snacks other children are taking, and what unhealthy snacks children are taking and why she shouldn't have them every day.


6. Set up a "snack station" and let your child choose each day.  Have lots of options ready to go so you're not scrambling every morning, and just let your child choose one of the healthy options you've already prepared for them. This might be the single most important key to healthy snacks for us.  My daughter loves dried fruit and nuts and will choose this every time over generic fruit snacks or cheese crackers, but if the chips or crackers are already packaged and the nuts and fruit are not - guess which one I'll put in her bag... If the healthy choices are ready to go, then they DO go!


5. Don't look on Pinterest.  Just don't. 

I think, above all, I learned that I have to pack what I know my child will eat, and how much my child will eat.  I can pack all the gluten-free, sugar-free, dairy-free, corn-free, oven-baked barley biscuits I want - but it doesn't make me a better mother if my child is just throwing them in the trash and going hungry...

~Nicole


Sunday, February 28, 2016

That Last Bit Of Jam

You ever have some jam or preserves so good you're scraping the sides of the jar just to get that last little bit?  I have.  And I've spent 5 minutes just trying to get that last little nibble, then felt heartbroken when I had to throw it in the trash without scraping it perfectly clean.  If you ever find yourself in this predicament again, let me introduce to you the Sundae in a Jam Jar:


I realize this isn't exactly an earth shattering revelation... But it was awesome.  Just take those last bits of jam, a scoop of ice cream, and a dollop of fresh whipped cream, and you no longer need to feel bad about wasting those last bits of preserves.  Why did it take me until 30 to learn this lesson?  All those years of jam wasted...

Thursday, June 11, 2015

Planting and Maintaining Tomatoes

The absolute minimum you need to do when planting using biodegradable cups is to remove the bottom.  Even though these cups are designed to biodegrade quickly, it still takes months, and will prevent the roots of your plants from expanding into the surrounding soil.  Just gently tear off the bottom, and loosen the roots.

Though many say it is not necessary to remove the remainder of the biodegradable material, I always peel as much off as comes off easily.  Sometimes the roots have begun to penetrate this layer and only small portions come off, but sometimes (as shown above) the entire casing will fall away when gently pulled on.  Again, just lightly loosen the outside roots. Then, simply plant in hole even with surrounding soil.
 
A few weeks after transplanting you'll need to start to sucker (or prune) your tomatoes.  You  may think that the more vines your plants grow the better, but this isn't the case.  Most tomato plants will continue to grow their vines through the entire summer.  All those vines take a lot of water and energy to maintain, and that's water and energy that won't be put into producing fruit!!

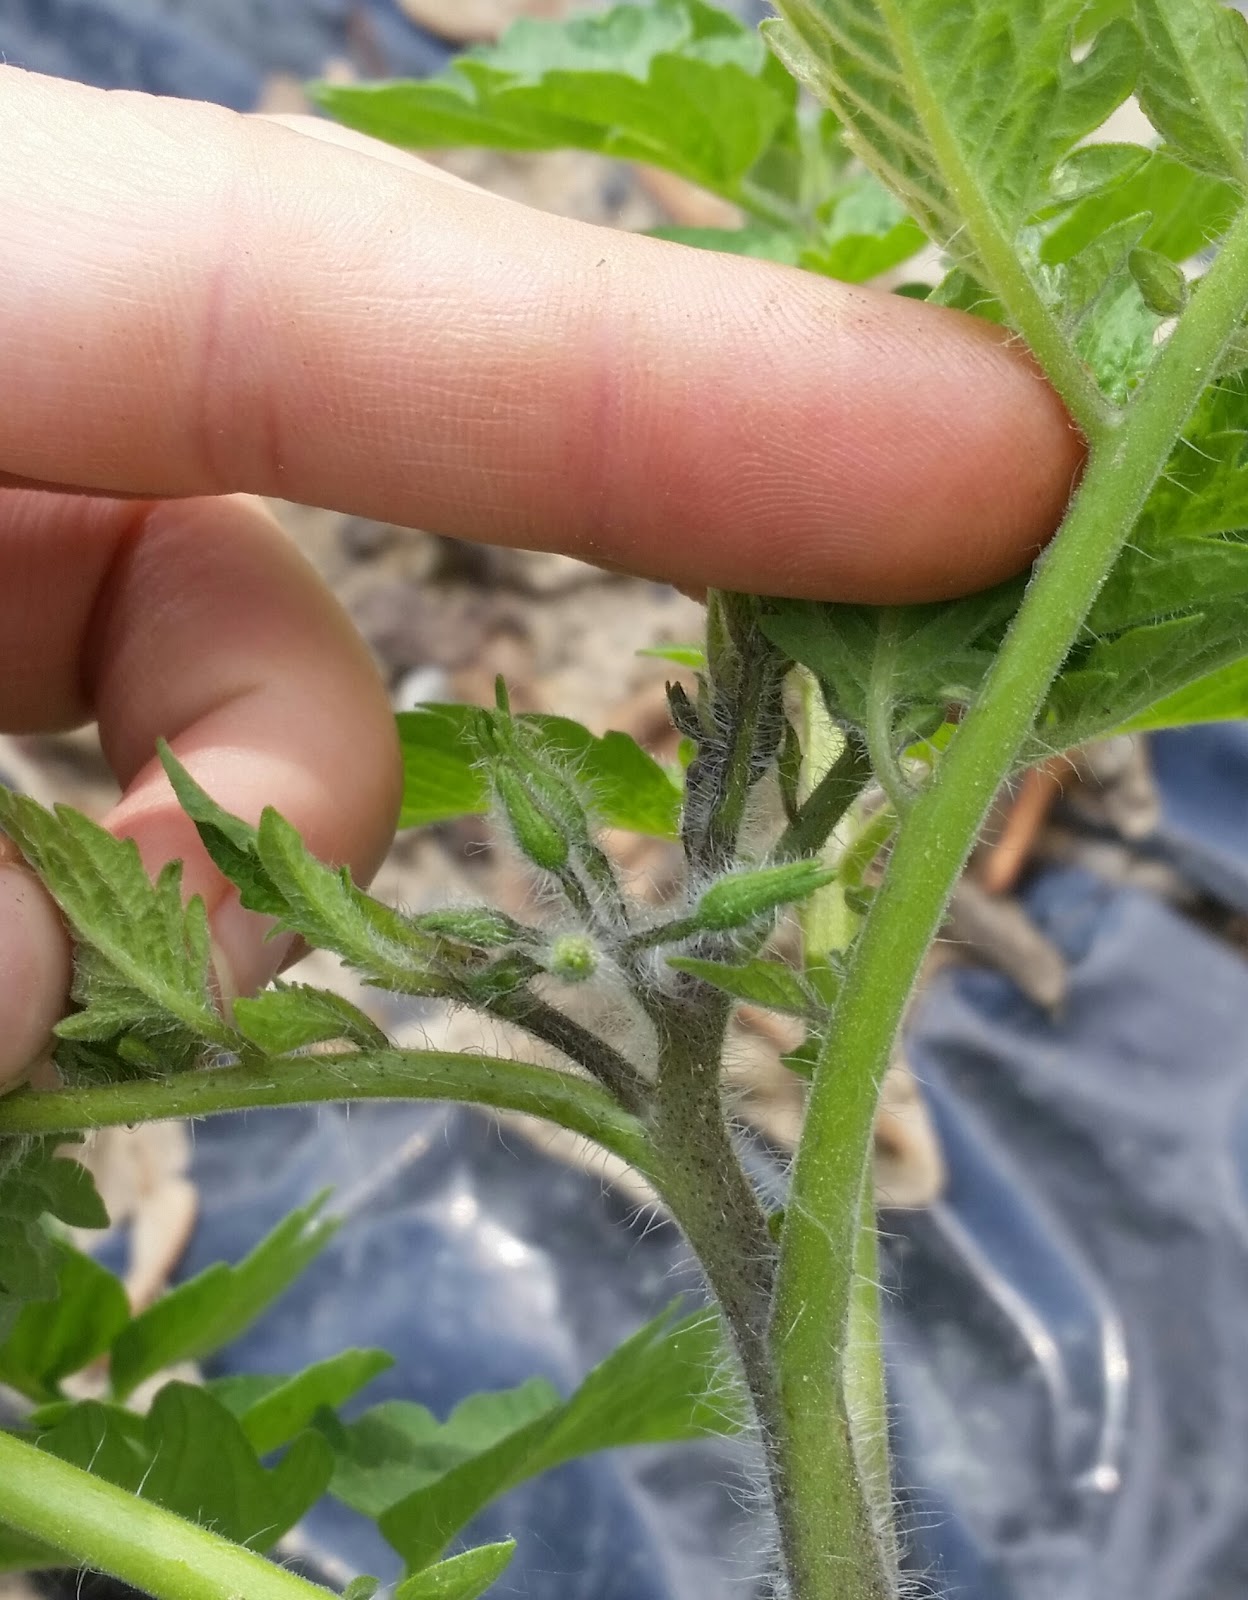
When 'suckers' form, so named because they suck production away from the fruit, begin plucking them off.  You can use small scissors, or just pinch them with your fingernails.  You'll know the suckers because they'll be small vine sprouts that form in the 'armpit' of the main stalk and auxiliary stems.

Be very careful though, because early blossoms and often look like these suckers and if you remove those as well you'll end up with a bare tomato plant!

As you can see highlighted in purple above, the suckers come directly out of the 'armpit' and have leaves exactly like the rest of the plant.  The tomato buds highlighted in orange, while close, do not come out of the armpit, and have small teardrop shaped buds. 
 
While it's best to remove the suckers early, do so ONLY if you're confident you can discern the difference between the suckers and the buds.  Otherwise, play it safe, and wait a week or two and the difference will be more noticeable.
 
Happy Gardening,
Nicole

Thursday, May 21, 2015

Laundry Detergent

I've been using homemade laundry detergent for over a year now.  AND I LOVE IT!  It cleans just as well as the fancy brands, and it's only fractions of the cost. 

The ingredient list:
1 Bar Fels Naptha Laundry Soap
1 Cup Borax
1 Cup Washing Soda
5 gallon bucket

How To:


Grate the Fels Naptha with a cheese grater into a saucepan and add water until the soap is just covered.  Bring to a low simmer and allow to simmer, stirring frequently, until soap is completely dissolved; about 15 minutes.


Meanwhile, fill a 5 gallon bucket about 1/4 - 1/3 with hot tap water and add 1 Cup Borax and 1 Cup Washing Soda and stir for a few minutes. 


When soap is completely dissolved, add to bucket and stir vigorously until mixture is smooth.  (Tip:  If you have the option, you can use a power drill and paint/cement mixer to make quick work of this part).  After the mixture is smooth, fill the bucket with hot tap water and mix again until smooth; it will go much faster this time. 

Allow the bucket to sit overnight to cool.  Mix one final time and divide into jugs if desired.  The mixture will need mixed periodically to prevent it from congealing.  (Tip:  I use my old laundry soap jugs and only fill about 3/4 full so there's room to shake it up before each load of laundry).

The Cost:
Fels Naptha..........................................$1.50
Borax
   $4/9Cups...........................................$0.44
Washing Soda
   $3.25/6Cups......................................$0.54_
                                               Total:    $2.48/5gallons

Talk about saving some serious money!  A 5 gallon bucket lasts my family of 5 for about 3 months.  In that same 3 month period I could easily spend $30-50 on laundry soap (or more) depending on the brand.  I love this stuff, and I hope you do to.

Nicole
 

Wednesday, May 6, 2015

Starting Tomato Seeds

Tomatoes like to be started indoors 6-8 weeks before being transplanted outside.  Here in northern Ohio, we can begin plating in our gardens sometime between May 1st and May 15th, depending on expected frost for the season.  That means I usually sow my seeds in mid-March.  It's tricky, because if you plant your seeds too early, your plants will grow too large before you can transplant and you cannot provide enough sunlight for them to thrive, but plant too late, and your harvest season is significantly cut short if there happens to be early frost.  For that reason, I usually do 2 plantings, about 2 weeks apart, and choose those that are largest and heartiest at planting time.

You can start your seeds many ways but there are two preferences for me.  Above, I've started them directly into disposable plastic cups.  Start by filling them about half full with potting soil then sprinkle in 2-4 seeds and cover lightly with more soil.  Keep the soil moist, but not soggy.  When they first sprout they'll grow two long smooth leaves, just as the second set of leaves sprout (after about 2 weeks, as shown above) add more soil until it's just below the first set of leaves.  Your tomatoes will then stay in these cups for several more weeks until ready for transplant!

These seeds I started using my alternate method.  I first planted them in just a tiny bit of soil in an egg carton.  Just as the previous method, once they started sprouting their second set of leaves, they were ready for more soil, so I transplanted them into biodegradable cups.  Fill the cup half full, then simply use a spoon to scoop out your tiny seedling from the egg carton (soil and all) and place them in your biodegradable cups.  Add more soil until it's almost to the bottom of the first set of leaves.  Another couple weeks and they'll look like the plants pictured above.  Notice how the first set of smooth leaves are starting to turn yellow/brown and fall off?  That's normal!

Whichever method you chose to start your seeds, once they're about 6-10 inches tall, they're ready to be planted outside!  As you can see above, your plants will have formed several sets of large leaves, and they will range in color from deep almost purplish green, to a bright lively green.  If you've only planted mass market seeds, you're likely to see only the bright green leaves, but I have found the heirloom seeds I've been saving over the years come in a much greater variety of color. 
 
Check back soon for some tips for hardening and transplanting your tomatoes outdoors.  And also, some helpful advice for getting your plants to produce the highest yield possible, since that's what all this works been for after all!
 
Happy growing,
Nicole


Monday, April 6, 2015

Freezing Asparagus

When I was able to score 15 pounds of asparagus for $14, you know I was thrilled! 
 
This is the time of year when asparagus is harvested, so it's fresh and delicious.  It's only harvestable for a few weeks though, and outside of this short period, its extremely expensive.  So, I buy up a years supply, and freeze it at home!
 

First, trim your asparagus.  Some people prefer to bend and snap it, but I feel like that wastes more than necessary, so I just trim it past the dry, woody part.  Usually an inch or two, but it depends on the age of the asparagus stalk when harvested.

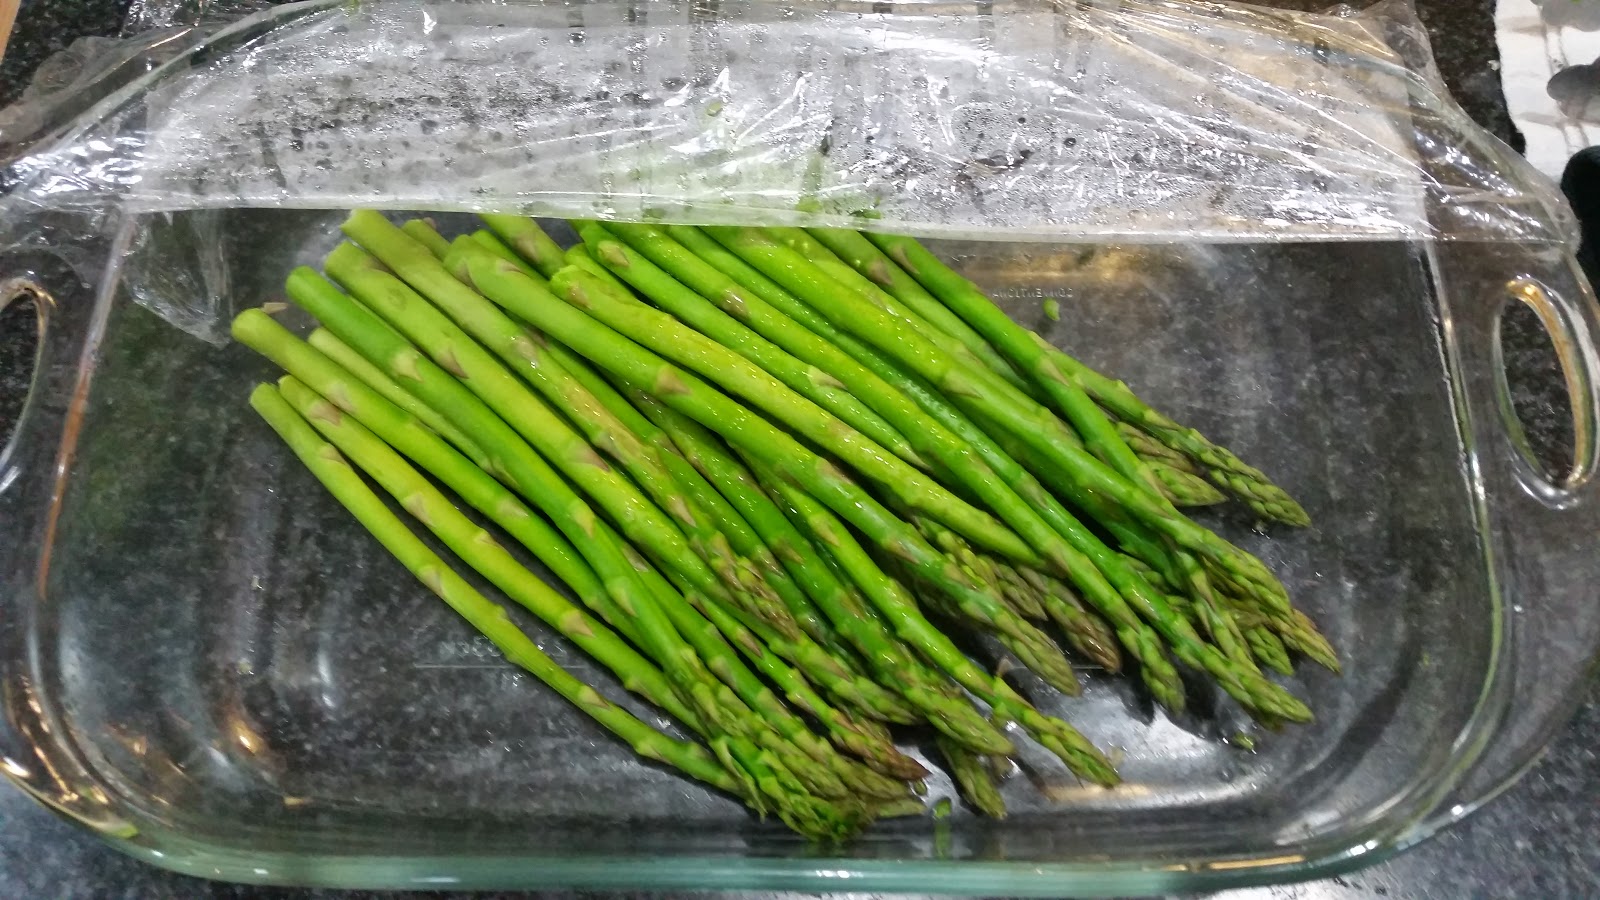
Then you need to partially cook the asparagus.  You can blanch it in boiling water a few minutes, but in my opinion it really leeches all the flavor and nutrition from the asparagus.  Instead, I place mine in a glass baking pan and cover with plastic then microwave for about 3 minutes for a medium to thick stalk. You'll notice they get very vividly green after just a couple minutes in the microwave.

After that, simply let them dry and cool on a dry dish towel, or paper towel if you prefer.

Last, place them in your preferred storage container and freeze quickly (avoid stacking them until fully frozen or it could take as much as several days for them to fully freeze).  Of course, a vacuum sealer would be ideal, but I have not made that commitment yet, so I use Ziploc style freezer bags.  If your stalks are shorter, they'll likely fit in a Quart size bag.  Mine were just a touch too long, so I froze 2 pounds in a gallon size bag, and left a small gap between each pound so I can easily remove one pound while keeping the other frozen for future use.  This comes in VERY handy for many frozen items.
 
Oh, and make sure to label and date your bags before filling!
 
Happy freezing,
Nicole
 

Wednesday, August 21, 2013

How to NOT Can Tomatoes

I had planned to write a highly motivational piece on how easy it is to can tomatoes.  That didn't happen.  While visiting my grandparents over the weekend I got bushels and bushels of tomatoes. Enough to cover a large portion of my counter 2 or 3 deep:


I used the same method for skinning and dicing/crushing the tomatoes as in my post, here, about freezing tomatoes.  I was very slow at first, but managed to get pretty good at it by the end.

Then I followed the directions that every blog on canning will tell you:
~Start a canning pot boiling
~Sanitize your jars, lids, etc.
~Heat your tomatoes and liquid (juice or plain water)
~Pack tomatoes into jars, pushing down with handle of wooden spoon
~Add acidity (I used lemon juice)
~Add liquid and use spoon again to release air bubbles
~Wipe jar and apply seal and ring
~Put in boiling canning pot..... This is where things went awry

The very first jar I put in broke immediately.  It must have taken me too long to fill the jars and this one cooled because it cracked the second I put it in the boiling water.  So I put the rest in, with no breaking, but the kept tipping over... Probably because my electric burner is a bit smaller than the canning pot so it sort of leaned a bit.  Once I got them all in though, they seemed to stand okay without knocking into each other.  Although I think that two of them did knock at some point, because when I checked on them later there were tomatoes floating around the entire pot and a clearly broken jar just floating around... Yay.

The others seemed to work okay, and sealed quite well.  Of course now I'm extremely worried that I did something horribly wrong and they'll all spoil before we get to use them.  What a terrible waste that would be.

And I'm sorry to disappoint if you were hoping for the horribly photographic evidence; I was far too distraught to think about anything other than all the hard work I'd put into peeling and dicing the tomatoes just to throw them down the drain *sigh*

Have you had a bad experience with canning?  Do you know what I did wrong?  Do you just want to laugh at me?
~Nicole

Tuesday, August 13, 2013

Freezer "Crushed" Tomatoes

These were extremely easy.  Seriously.  And freezing them means that I don't have to mess with canning, because honestly, it kind of scares me.  The plus side is that (as I have done here) you can do this in small batches as you gather a few extra tomatoes from your garden, or in my case, your grandparent's garden ;) 

Though it's very easy, getting the skin off is the most time consuming part.  Here's the trick though.
Start by making a small "X" or simply poking a knife in the bottom of your tomatoes.
 
Dunk them into a large pot of boiling water, just a few at a time.  Within a minute the skin should split from where you broke the skin. 

When skin breaks, remove them from boiling water immediately and submerge them in ice water to draw the skin back even farther.
 
Gently peel back the skins, cut out the stems, and squeeze or scoop our seeds and juice.  As you can imagine, this is an extremely messy task.  That's why I recommend doing this part over a colander in the sink to catch anything that slips out of your hands.

Use your hands or a knife to crush or cut the tomato flesh into small pieces in the colander.  This helps to eliminate some excess juice.

Then scoop your tomatoes into a baggie and label and date them.  Easy as pie.  Another trick is to lie them out flat like this in your freezer.  They'll stack better and thaw quicker.

(**Update: Check out my related post on How NOT to Can Tomatoes**)

Enjoy the flavor of sun ripened tomatoes all year round.
~Nicole

Saturday, June 8, 2013

Ultimate Taco Seasoning

We love Love LOVE tacos in my house, but the taco seasoning you buy in packets in the grocery store is so darn expensive in the long haul, and is full of extra ingredients like corn flour and colorants.  This is why I've developed my own recipe!


There's ton's of recipes out there, and they're all different, coming in different portion sizes, with different ingredients, and different spice ratios.  I've tried to use and compare as many mixes as I could before deciding what worked best for me.  Plus, I've come up with a recipe for both a bulk and individual size!  How nice of me :-D

So, without further ado, I've included teaspoon measurements if you'd like to halve the recipe:

bulk recipe taco seasoning:
1/3 C. (16 tsp.) Chili Powder
 1/4 C. (12 tsp.) Paprika
3.5 T. (10 tsp.) Cumin
3 T. (9 tsp.) Onion Powder
 2 T. (6 tsp.) Garlic Powder
2T (6 tsp.) dried oregano
2T (6 tsp.) dried cilantro
1T (3 tsp.) Salt
Use 2 T. per 1lb. ground beef, plus or minus to taste, plus 1/2 cup water.  Simmer 3-4 minutes to distribute flavors.
Mix all ingredients thoroughly and store in your preferred, air-tight method.  My favorite storage right now is mason jars with shaker lids scavenged from old Parmesan bottles!  And maybe someday I'll even get around to giving them pretty labels.  But for now, white stickers and black sharpie will just have to do:


Also, I've tried smoked salt and/or smoked paprika and both are delicious!  I especially like these flavors on chicken and pork tacos.  You could also add crushed red pepper or cayenne pepper for a spicier variety.  Just start with small amounts, you can always add more if necessary. 

For a single serving, this isn't exactly the same spice ratio, but it's darn close!


single serve taco seasoning:
1.5 tsp. chili powder
1.25 tsp. paprika
1 tsp. cumin
1 tsp. onion powder
.5 tsp garlic powder
.5 tsp oregano
.5 tsp cilantro
.25 tsp. salt

mix all ingredients in small bowl and sprinkle over 1 lb. ground beef, adding 1/2 cup water.  Simmer 3-4 minutes and enjoy.


 Enjoy!
~Nicole

Thursday, June 6, 2013

Dried Candied Mango Slices

In my previous post, I showed you how to perfectly cut your mango slices.  Now you're ready to begin prepping them for drying. All you need is a decent thermometer and a dehydrator. This is the one I've used for over 5 years and it's never let me down! If you're buying one from amazon, please consider using my link above or at the bottom of the post. I'll get a tiny kickback for sending you to them, even if you purchase a different product than I linked to. I would greatly appreciate the click.

For simple dried mango slices, spritz with lemon or orange juice (to prevent oxidization which turns the fruit brown) and place in a dehydrator at 130 degrees F anywhere from 6-16 hours depending on the thickness of your slices and relative humidity.

If, at this point you'd like to add a bit of sweetness to your mangoes make a simply syrup in a large pan by combining 6 parts warm water to 1 part granulated sugar (I used 6 cups of water and 1 cup of sugar).


Place your mango slices in the sugar water and slowly bring to 190-200 degrees F on medium/medium-low heat.  DO NOT BOIL the water.  As soon as it reaches temperature, remove the pan from the heat and cover it.  Allow the mangoes to soak overnight, or at least 6 or 8 hours in the water.

Remove the mangoes from the liquid and allow to dry for a few minutes in a colander.  You can save the liquid, which will have quite a bit of mango pulp in it to use for fruit leathers.  Layer your mangoes evenly on dehydrator rack, making sure they don't overlap.  They can be nearly touching, because they will almost immediately shrink allowing good air flow around all pieces.


Follow the instructions of your dehydrator, but depending on the thickness, quantity, relative humidity, and effectiveness of your dehydrator, it could take anywhere from 6-16 hours at 130 degrees.  If you'd like, you can set the temperature 10-15 degrees higher for the first hour because the rapid evaporation of water will keep the fruit 10-15 degrees below ambient temperature at first.  Be careful though, because if you forget to turn it down, you'll end up with pieces that are overly dry on the outside but are still too moist in the center.

Whatever you choose to do, begin checking them before you expect them to be done.  I expected mine to be ready after about 8-10 hours, but after about 6 hours, I checked mine, and they were done.  Some of the smaller pieces may be a bit hard or crispy and even the thin edges of the larger pieces will be a bit over dry.  The centers should still have a bit of moisture.  They'll feel a bit like sticky leather; soft and pliable.


At this point, place all the mangoes in a plastic bag for 12-24 hours.  This allows the moisture to re-distribute between the pieces and  those once crispy pieces will soften and the centers of your thicker slices will dry out a bit more.  After this you can transfer them to your preferred storage container (glass works best), or you can candy them.  This time around I sprinkled powdered sugar right in the plastic bag and shook them around until all the pieces were thoroughly coated.  I've also had success with granulated sugar or raw sugar.  Whatever you choose will be determined by your personal preferences.


Again, once the pieces are coated, they'll store best in an air-tight glass jar.  For long term storage, you can keep them in the fridge about six months or freezer 9 months to a year.

I hope this satisfies your sweet tooth, and enjoy!
~Nicole