Showing posts with label bulk food. Show all posts

Sunday, February 26, 2017

Seed Spacing in the Home Garden

Forget everything you think you know about seed spacing. In the home garden we can easily double or triple our yields by giving up on planting our garden according to the guides on the back of our seed packets. Those guides are great for certain applications. But let's be clear, that isn't in the home garden. That's because those seed spacing guides are designed for large scale farming where seeds are planted in perfect rows because it makes mechanical harvesting easier. Row spacing is dictated so that specialized tractors can span several rows and their large tires can fit neatly between rows. In the home garden, we aren't using specialized equipment to harvest, so why are we even planting in rows? Take a look at how much we can gain with our carrots, spinach, onions, and cabbage when we give up planting in rows:


If we plant in rows, using traditional spacing, yields of these common vegetables is relatively low in a 4'x4' bed. At this level of production, it's no wonder so many home gardener's say it's not worth it. However, if we discard planting in neat rows a foot apart, we can produce as much as 3 times the yield in the same space! And since we're working in a 4 foot raised bed, we don't need rows to walk (or run equipment) through; we can reach those plants in the center perfectly well.

Lets also not forget, we can plant even more if we intend to harvest some young plants. Onions and spinach in particular can be planted at twice the rate shown above, and harvest every other plant for eating when young, allowing those left to grow to maturity.


Notice on the left the already more than tripled production when we stop planting in rows, but we don't need to stop there. Because young onions and spinach are so much smaller than mature plants, they can be planted with only half the distance between plants. Then, as they mature we can selectively harvest as shown by the outlines in the right picture to allow those remaining plants enough space to grow to maturity.

The effect of this type of planting is two fold. First, it allows us to have twice as many plants in the same amount of space, effectively doubling our harvest. Second, because the plants are spaced much closer when small they will quickly shadow any weeds that might try to grow between plants preventing them from taking root thus decreasing the need for weeding.


So many home gardeners find themselves plagued with low yields and heavy weeding. That's because the traditional methods of planting seeds aren't designed for the home garden. When we rethink how we plant and harvest our garden we can double, or even more than triple the harvest without a need for increased garden beds. And in the case of spinach and onions, we can reap more than 5x the produce by interspersing our baby spinach and green onions with those plants we intend to allow to grow to maturity. And we can do all this while decreasing the time invested weeding our beds. It doesn't get any better than that!

Let's get planting!
Nicole

Monday, April 6, 2015

Freezing Asparagus

When I was able to score 15 pounds of asparagus for $14, you know I was thrilled! 
 
This is the time of year when asparagus is harvested, so it's fresh and delicious.  It's only harvestable for a few weeks though, and outside of this short period, its extremely expensive.  So, I buy up a years supply, and freeze it at home!
 

First, trim your asparagus.  Some people prefer to bend and snap it, but I feel like that wastes more than necessary, so I just trim it past the dry, woody part.  Usually an inch or two, but it depends on the age of the asparagus stalk when harvested.

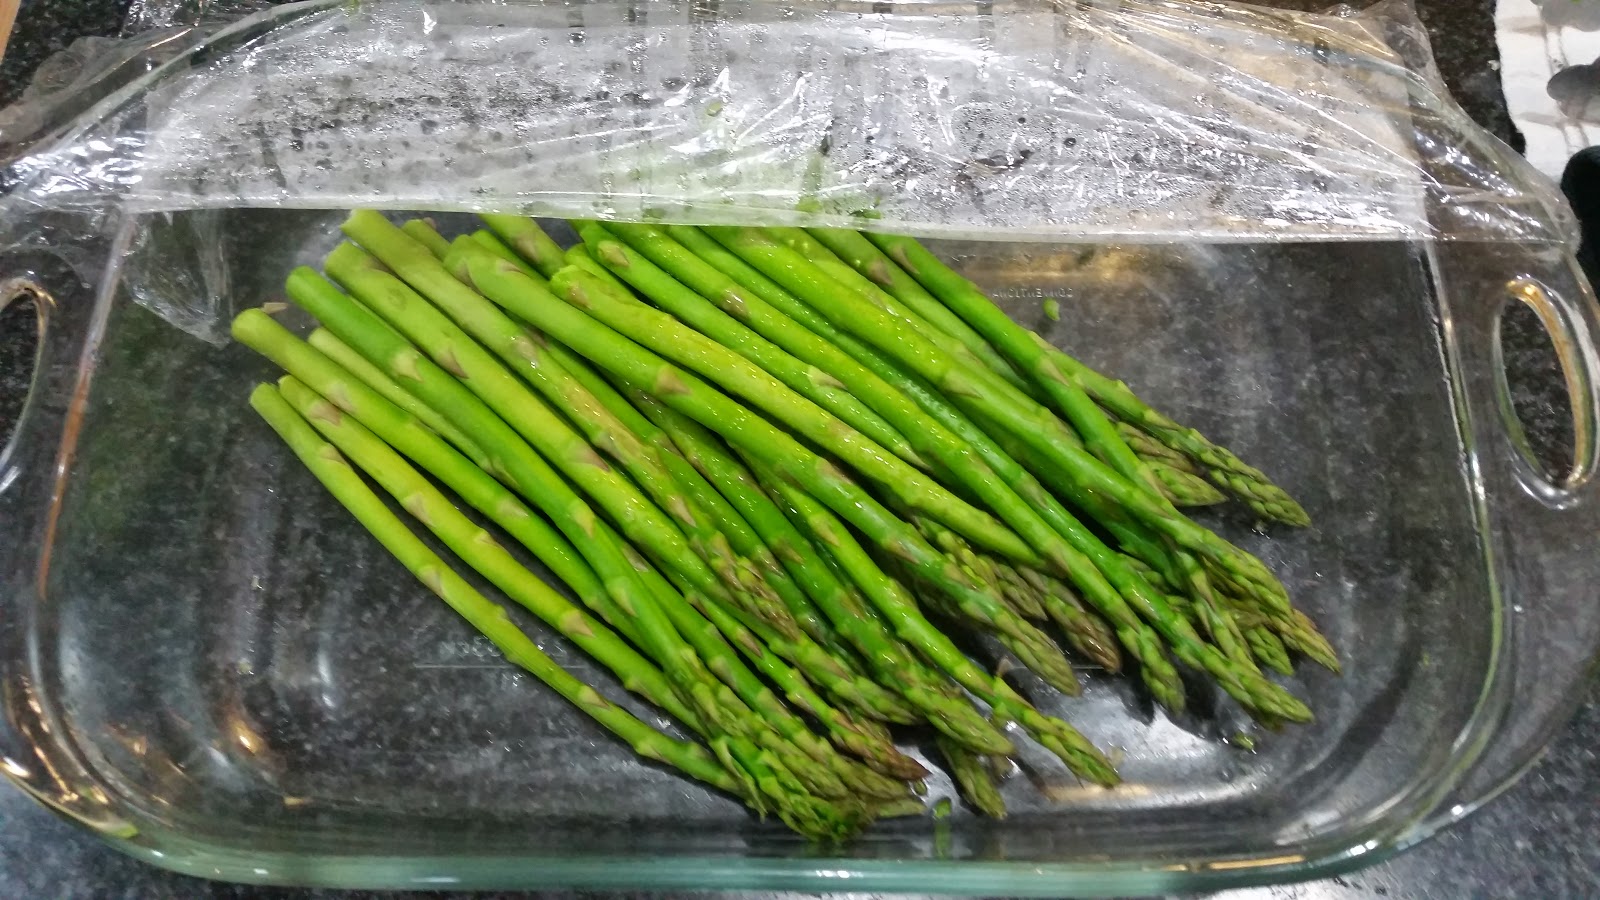
Then you need to partially cook the asparagus.  You can blanch it in boiling water a few minutes, but in my opinion it really leeches all the flavor and nutrition from the asparagus.  Instead, I place mine in a glass baking pan and cover with plastic then microwave for about 3 minutes for a medium to thick stalk. You'll notice they get very vividly green after just a couple minutes in the microwave.

After that, simply let them dry and cool on a dry dish towel, or paper towel if you prefer.

Last, place them in your preferred storage container and freeze quickly (avoid stacking them until fully frozen or it could take as much as several days for them to fully freeze).  Of course, a vacuum sealer would be ideal, but I have not made that commitment yet, so I use Ziploc style freezer bags.  If your stalks are shorter, they'll likely fit in a Quart size bag.  Mine were just a touch too long, so I froze 2 pounds in a gallon size bag, and left a small gap between each pound so I can easily remove one pound while keeping the other frozen for future use.  This comes in VERY handy for many frozen items.
 
Oh, and make sure to label and date your bags before filling!
 
Happy freezing,
Nicole
 

Wednesday, August 21, 2013

How to NOT Can Tomatoes

I had planned to write a highly motivational piece on how easy it is to can tomatoes.  That didn't happen.  While visiting my grandparents over the weekend I got bushels and bushels of tomatoes. Enough to cover a large portion of my counter 2 or 3 deep:


I used the same method for skinning and dicing/crushing the tomatoes as in my post, here, about freezing tomatoes.  I was very slow at first, but managed to get pretty good at it by the end.

Then I followed the directions that every blog on canning will tell you:
~Start a canning pot boiling
~Sanitize your jars, lids, etc.
~Heat your tomatoes and liquid (juice or plain water)
~Pack tomatoes into jars, pushing down with handle of wooden spoon
~Add acidity (I used lemon juice)
~Add liquid and use spoon again to release air bubbles
~Wipe jar and apply seal and ring
~Put in boiling canning pot..... This is where things went awry

The very first jar I put in broke immediately.  It must have taken me too long to fill the jars and this one cooled because it cracked the second I put it in the boiling water.  So I put the rest in, with no breaking, but the kept tipping over... Probably because my electric burner is a bit smaller than the canning pot so it sort of leaned a bit.  Once I got them all in though, they seemed to stand okay without knocking into each other.  Although I think that two of them did knock at some point, because when I checked on them later there were tomatoes floating around the entire pot and a clearly broken jar just floating around... Yay.

The others seemed to work okay, and sealed quite well.  Of course now I'm extremely worried that I did something horribly wrong and they'll all spoil before we get to use them.  What a terrible waste that would be.

And I'm sorry to disappoint if you were hoping for the horribly photographic evidence; I was far too distraught to think about anything other than all the hard work I'd put into peeling and dicing the tomatoes just to throw them down the drain *sigh*

Have you had a bad experience with canning?  Do you know what I did wrong?  Do you just want to laugh at me?
~Nicole

Tuesday, August 13, 2013

Freezer "Crushed" Tomatoes

These were extremely easy.  Seriously.  And freezing them means that I don't have to mess with canning, because honestly, it kind of scares me.  The plus side is that (as I have done here) you can do this in small batches as you gather a few extra tomatoes from your garden, or in my case, your grandparent's garden ;) 

Though it's very easy, getting the skin off is the most time consuming part.  Here's the trick though.
Start by making a small "X" or simply poking a knife in the bottom of your tomatoes.
 
Dunk them into a large pot of boiling water, just a few at a time.  Within a minute the skin should split from where you broke the skin. 

When skin breaks, remove them from boiling water immediately and submerge them in ice water to draw the skin back even farther.
 
Gently peel back the skins, cut out the stems, and squeeze or scoop our seeds and juice.  As you can imagine, this is an extremely messy task.  That's why I recommend doing this part over a colander in the sink to catch anything that slips out of your hands.

Use your hands or a knife to crush or cut the tomato flesh into small pieces in the colander.  This helps to eliminate some excess juice.

Then scoop your tomatoes into a baggie and label and date them.  Easy as pie.  Another trick is to lie them out flat like this in your freezer.  They'll stack better and thaw quicker.

(**Update: Check out my related post on How NOT to Can Tomatoes**)

Enjoy the flavor of sun ripened tomatoes all year round.
~Nicole

Saturday, June 8, 2013

Ultimate Taco Seasoning

We love Love LOVE tacos in my house, but the taco seasoning you buy in packets in the grocery store is so darn expensive in the long haul, and is full of extra ingredients like corn flour and colorants.  This is why I've developed my own recipe!


There's ton's of recipes out there, and they're all different, coming in different portion sizes, with different ingredients, and different spice ratios.  I've tried to use and compare as many mixes as I could before deciding what worked best for me.  Plus, I've come up with a recipe for both a bulk and individual size!  How nice of me :-D

So, without further ado, I've included teaspoon measurements if you'd like to halve the recipe:

bulk recipe taco seasoning:
1/3 C. (16 tsp.) Chili Powder
 1/4 C. (12 tsp.) Paprika
3.5 T. (10 tsp.) Cumin
3 T. (9 tsp.) Onion Powder
 2 T. (6 tsp.) Garlic Powder
2T (6 tsp.) dried oregano
2T (6 tsp.) dried cilantro
1T (3 tsp.) Salt
Use 2 T. per 1lb. ground beef, plus or minus to taste, plus 1/2 cup water.  Simmer 3-4 minutes to distribute flavors.
Mix all ingredients thoroughly and store in your preferred, air-tight method.  My favorite storage right now is mason jars with shaker lids scavenged from old Parmesan bottles!  And maybe someday I'll even get around to giving them pretty labels.  But for now, white stickers and black sharpie will just have to do:


Also, I've tried smoked salt and/or smoked paprika and both are delicious!  I especially like these flavors on chicken and pork tacos.  You could also add crushed red pepper or cayenne pepper for a spicier variety.  Just start with small amounts, you can always add more if necessary. 

For a single serving, this isn't exactly the same spice ratio, but it's darn close!


single serve taco seasoning:
1.5 tsp. chili powder
1.25 tsp. paprika
1 tsp. cumin
1 tsp. onion powder
.5 tsp garlic powder
.5 tsp oregano
.5 tsp cilantro
.25 tsp. salt

mix all ingredients in small bowl and sprinkle over 1 lb. ground beef, adding 1/2 cup water.  Simmer 3-4 minutes and enjoy.


 Enjoy!
~Nicole