Tuesday, March 28, 2017

How much sun?

My garden has been very small the last few years. That is strictly due to the fact that nearly all of my yard is shaded. I have one small strip of yard, about 8 feet wide and 30 feet long, that gets a moderate amount of sun each day. But I wont let that stop me this year! There are plenty of vegetables and herbs that not only tolerate, but thrive in the shade. It's just a matter of knowing which ones. Here's a general rule of thumb when deciding where to plant your crop.

"Root or fruit, in full sun for the biggest loot
Leaf or stem, partial shade will do for them"

Generally speaking, this holds quite true. But of course, there are always exceptions. If you want a complete breakdown of both sun and shade tolerant crops hop over to my new blog, The Ohio Homesteader, where I've compiled a list of the hours of direct sun that is ideal for each crop.

 
if you happen to be buying anything on amazon, please consider going to amazon via on of the images above. It wont cost you any extra and you can buy anything, but amazon will give me a few pennies for each person who purchases using the links above. I would greatly appreciate it.


Monday, March 13, 2017

We're almost like a real urban homestead now

I've had a garden to a varying degree most of my life. The last few years it's been small - a solitary 4'x24' raised bed with the occasional garlic, horseradish, or herb planted like landscaping around my house. All winter I tried to devise a way to grow my garden, but the problem is that most of my yard is shaded by a neighbors tree. The very small bit of yard where there is some sun is where we're putting up the kids swing set and trampoline this spring. I had to come up with another means to provide for the family.

Then it hit me...

Chickens do quite will under the shade of a tree! We'd talked for 2 years about wanting chickens, but I've never had chickens and had no clue where to begin. So last spring and summer I did some reading. I read about chickens needs in a coop, ways to cut feed costs, breed attributes, and city restrictions (luckily there really aren't any here).

So I've spend the last 2 weeks thinking through everything I've learned. Trying to decide how many hens I want, how large of a coop we'll need for them, a coop layout, which breeds we want, and how we're going to get them.

First we decided to get 12 chicks. This is probably going to be way more than we need, but we expect to lose 1 or 2 in the beginning. And we figured it was safer to have too many and need to give one away (or put it on the Sunday dinner table) than to start with too few and be disappointed with our results.

The coop design has been a challenge. And it's a challenge we're still working on. We're making a lean-to style coop off the back of our garage, but that's about all we've agreed on...

We decided to get a 6 different breads, 2 of each. Since we have no clue what's going to work well for us we decided to just try as many as we could. The ones that aren't working will just end up on the dinner table this winter and next spring we can expand on those breeds that worked out well for us.

We chose:
Easter Egger for their beautiful blue and teal eggs
Golden and Silver laced Wyandotte because they are very beautiful and tolerate cold well
Dominique because they're extremely cold hardy
Welsummer for their brown eggs covered in very dark brown speckles
Black Australorp for their iridescent feathers and high egg production

So they're ordered, paid for, and will be waiting for us at the end of the month! We were lucky to have a reputable hatchery a short drive from our home so we'll be taking the kids on a road trip to pick them up.

Happy Chickens.


Sunday, February 26, 2017

Seed Spacing in the Home Garden

Forget everything you think you know about seed spacing. In the home garden we can easily double or triple our yields by giving up on planting our garden according to the guides on the back of our seed packets. Those guides are great for certain applications. But let's be clear, that isn't in the home garden. That's because those seed spacing guides are designed for large scale farming where seeds are planted in perfect rows because it makes mechanical harvesting easier. Row spacing is dictated so that specialized tractors can span several rows and their large tires can fit neatly between rows. In the home garden, we aren't using specialized equipment to harvest, so why are we even planting in rows? Take a look at how much we can gain with our carrots, spinach, onions, and cabbage when we give up planting in rows:


If we plant in rows, using traditional spacing, yields of these common vegetables is relatively low in a 4'x4' bed. At this level of production, it's no wonder so many home gardener's say it's not worth it. However, if we discard planting in neat rows a foot apart, we can produce as much as 3 times the yield in the same space! And since we're working in a 4 foot raised bed, we don't need rows to walk (or run equipment) through; we can reach those plants in the center perfectly well.

Lets also not forget, we can plant even more if we intend to harvest some young plants. Onions and spinach in particular can be planted at twice the rate shown above, and harvest every other plant for eating when young, allowing those left to grow to maturity.


Notice on the left the already more than tripled production when we stop planting in rows, but we don't need to stop there. Because young onions and spinach are so much smaller than mature plants, they can be planted with only half the distance between plants. Then, as they mature we can selectively harvest as shown by the outlines in the right picture to allow those remaining plants enough space to grow to maturity.

The effect of this type of planting is two fold. First, it allows us to have twice as many plants in the same amount of space, effectively doubling our harvest. Second, because the plants are spaced much closer when small they will quickly shadow any weeds that might try to grow between plants preventing them from taking root thus decreasing the need for weeding.


So many home gardeners find themselves plagued with low yields and heavy weeding. That's because the traditional methods of planting seeds aren't designed for the home garden. When we rethink how we plant and harvest our garden we can double, or even more than triple the harvest without a need for increased garden beds. And in the case of spinach and onions, we can reap more than 5x the produce by interspersing our baby spinach and green onions with those plants we intend to allow to grow to maturity. And we can do all this while decreasing the time invested weeding our beds. It doesn't get any better than that!

Let's get planting!
Nicole

Sunday, February 5, 2017

Starting Seed in February

It's just about a week into February, and my garden planning is in full swing. Depending on your plant hardiness zone (which you can find here) it's time to start sowing seeds indoors, or even directly outside under cover! If you're in zone 5-6, this guide should be just about right for you! You'll have to adjust by a week or two according to your exact last frost date. Ours is May 15th just for reference.


Some of the earliest seed you should be starting indoors (or out) is onion. For us, the first two weeks of February is golden. Planting onions later is not only possible, but encouraged, but it's this first planting that you'll leave in the garden all summer long to form large beautiful onion bulbs. Any bulb forming onion variety will work, but I prefer an open pollinated seed for reasons I'll discuss later. Also, ensure the variety you're getting is of the right day-length, which I'll also discuss later, but basically, northern states get long-day and southern states get short-day.

For starting onion indoors, just dampen a 6" pot of rich soul and sprinkle seeds in generously. Don't worry too much about crowding at this point. Onion roots are very thick and tough and will separate well in several weeks for transplanting even when crowded.  Keep the top layer of soil moist until the seeds sprout and then water only as needed until it's time for transplant.

After onions, find yourself a nice cold hardy variety of lettuce. Plant these in mid-February so they're ready for planting outside in April (or March under a cold-frame). Since these will be inside for a little while, I find it's best to plant them directly into 4" pots. Of course you can plant in starters, and then transplant later, but why bother? Just like onions, keep the soil misted with water until the seeds sprout, then water as necessary. Once the seeds are well established, pinch or snip off all but the strongest seedling in each pot; pull them, and you risk pulling them all!

Once my lettuce is well established, I start in on my spinach. It has basically the same care needs as lettuce with one notable exception: spinach does not tolerate transplant all that well, so always use a larger pot to avoid excess root disturbances. Just like lettuces, these seedlings can go outside in mid March under a cold frame, or in April unprotected. Contrary to what you might expect from seemingly delicate greens, they thrive in the cold and have a much sweeter taste and crunchier texture when grown before the heat of summer sets in.

Just remember when starting your seeds, that these are my personal start dates, and are good for those living in zones 5 and 6 with an average last frost date around May 15th. You'll need to adjust accordingly if you're in a significantly warmer or cooler climate.

#AtHomeWithNicole

Tuesday, April 12, 2016

Seedlings

I hope you've got your seeds started!  If not, it's okay - do it now while there's still just a little bit of time.  But this truly is your last chance.


This year, I'm only starting tomatoes and lavender from seeds.  The tomatoes I started a week or 2 ago, and the lavender I started a month ago.  Oh boy, do those lavender seeds take a long time to sprout.  After about 3 weeks, just when I'd assumed I'd killed them and they weren't going to sprout, I saw the first tiny little green bud.  Several days went by and it was still a tiny bud.  After a week, I could finally see a stem and leaf.  And even now, they've been sprouted for well over a week, maybe even 2 weeks, and this is all I've got:


Let me know if you've got any secrets I don't know about to get lavender going!

I justy got in my first onion bulbs and my horseradish has sprouted, but we'll discuss that next time.

Happy sprouting,
Nicole

Sunday, March 6, 2016

Surviving School Snacks

My middle daughter started Kindergarten this fall, and it was requested that she bring a small snack in each day.  Sounds easy enough, right?  I mean, she had a small afternoon snack at home every day, so sending one in should be no problem. 

Yea...  I found out pretty quickly how easy it is to fall into the trap of sending high calorie, low nutrition snacks based on either carbs and salt, or sugar.  These snacks are so easy, because it's what they sell individually packaged in every grocery store.

Determined to find a better alternative, I've come up with some great options.  For starters, don't ditch those store bought snacks all together - there's a reason they're so popular - because kids love them!  This is especially important for picky eaters.  We want our kids to eat healthy snacks, but what good does it do them to send the most nutritious snack with them if it ends up in the trash?  If your child will only eat applesauce and cheese crackers, make sure you're getting no sugar added applesauce, and try cheese crackers with peanut butter for a bit of protein.

Here's how we've managed to survive school snacks:


1. Invest in a small insulated cooler pack, and reusable ice pack - like the kind used for baby bottles.  Keep it small to reduce the bulk in their backpack.  Having the availability to keep food chilled until snack time means you can pack things like yogurt, cottage cheese, sliced fruit and veggies, or cheese
2. Those prepackaged little portions are so unbelievably expensive, and while buying in bulk and using zip top snack size bags might seem like a perfect solution - we found that most foods you'd want to put in them ended up crushed and undesirable.  We invested in reusable cups with lids (that were like $2 for a 6 pack) and it's allowed me to save money by buying large quantities of foods like crackers, nuts, berries, chips, and even breakfast cereal and divide them up. 


3. Don't be afraid to send veggies.  Baby carrots, celery, cucumber sticks, bell pepper slices, and grape tomatoes all hold up well during transport.  If your child really needs ranch, you can squirt some in the bottom of your Tupperware, then put your veggie sticks in and close it up.  But skip the ranch if you can get away with it.

4. This may seem silly, but talk to your child about snacks. Thanks in part to changing dietary standards in schools, your child will likely spend a little bit of time talking about healthy eating in school.  Use this to your advantage by asking her what healthy snacks are her favorites, what healthy snacks other children are taking, and what unhealthy snacks children are taking and why she shouldn't have them every day.


6. Set up a "snack station" and let your child choose each day.  Have lots of options ready to go so you're not scrambling every morning, and just let your child choose one of the healthy options you've already prepared for them. This might be the single most important key to healthy snacks for us.  My daughter loves dried fruit and nuts and will choose this every time over generic fruit snacks or cheese crackers, but if the chips or crackers are already packaged and the nuts and fruit are not - guess which one I'll put in her bag... If the healthy choices are ready to go, then they DO go!


5. Don't look on Pinterest.  Just don't. 

I think, above all, I learned that I have to pack what I know my child will eat, and how much my child will eat.  I can pack all the gluten-free, sugar-free, dairy-free, corn-free, oven-baked barley biscuits I want - but it doesn't make me a better mother if my child is just throwing them in the trash and going hungry...

~Nicole


Sunday, February 28, 2016

That Last Bit Of Jam

You ever have some jam or preserves so good you're scraping the sides of the jar just to get that last little bit?  I have.  And I've spent 5 minutes just trying to get that last little nibble, then felt heartbroken when I had to throw it in the trash without scraping it perfectly clean.  If you ever find yourself in this predicament again, let me introduce to you the Sundae in a Jam Jar:


I realize this isn't exactly an earth shattering revelation... But it was awesome.  Just take those last bits of jam, a scoop of ice cream, and a dollop of fresh whipped cream, and you no longer need to feel bad about wasting those last bits of preserves.  Why did it take me until 30 to learn this lesson?  All those years of jam wasted...

Tuesday, December 8, 2015

Fragile Little Elf

Like most kids,  mine love their elf in the shelf.  The girls understand they can't touch her or play with her,  but Ronan just doesn't care.  He knows he's not allowed,  but does anyway.  That's why this happened:


Do you think this will get it into his head?  No,  I didn't think so either.  But at least this way I don't have to come up with new creative ways to pose or elf! 

Monday, August 31, 2015

2 Fast and Easy Minecraft Projects

So my daughter chose a Minecraft theme for her 7th birthday party!  It was pretty exciting, except that there's no Minecraft party goods in stores (not that I have found anyway).  So I made a few projects at home.  They were so easy, fast, and inexpensive! Can't beat that.

I started with the Steve head.  I made this the morning of the party, and it took less than 30 minutes!  Unfortunately, I didn't think to get any in progress photo's for you, but really -- I think it's pretty obvious when you look at the finished product.  Then literally 5 minutes before kids were set to arrive, I said to my husband "we don't have any games!  Maybe I should make a 'pin the tail on the pig' game and we could use the Steve head as a blind fold?"  He looked at me like I was crazy.  I knew he was thinking 'you have 5 minutes... it'll never happen.'  But I already had it in my mind how I could very quickly make this pig, and in less than 5 minutes! 

So I did.  And below you'll see a quick and dirty explanation of how I went about making these projects so you can do them too!


Steve Head:
1. Start with any box that is roughly square, I used an old box from baby wipes
2. Use full sheets of brown to cover sides of box.  You can use any adhesive you like. (If you prefer only one face, cover 3 sides)
3. Stack several sheets of black construction paper and cut them into squares that are roughly 1/6 the width of your box.  It's better to err on the side of too large because you can always overlap them;  too small and you'll have gaps between your squares, or you'll need to add an extra and they won't line up.
4. Following the pictures above, use 6 squares of black across the top of the face, then one on each side of the face just below the top row.  Then to create the mouth use 3 squares, centered on the bottom, and a half square above each side of the mouth. 
5. (optional) follow step 4 on opposite side of box to create another face. 
6. Create the eyes using a square of white, with a half square of black placed on top and position on face.
7. Use a small square to make the nose.  I did not have a good color for this, so I simply cut a square of brown packaging tape and stuck it on for the nose.
8. Cover the entire top of the box with the black squares (and back of head if you chose not to create the optional second face)
9. Following the second picture above, apply 2 full rows of black squares along top of box, then continue down center until you reach the bottom of the box (or for one face, continue down 2/3 of box, leaving brown exposed next to face).


Pin The Tail on The Pig:
1. Start with a large sheet of paper, foam board, cardboard, etc.  I didn't have a single large sheet, so I used invisible tape to piece together two sheets of 11x17 printer paper.
2. Place a full sheet of pink construction paper for the pigs body.  It should be slightly to the bottom right of center.  Perfection is NOT necessary! Leave a space un-stuck for the legs to go under.
3. Use 4 rectangles of pink for the pigs legs and place them under the body as pictured above.
4. Cut a square of pink paper about 6"x6" and place as shown for head.
5. Cut a square of red paper about 2"x2" for the nose and place on face.  (Optional: cut a few smaller squares and place on pigs back for freckles)
6. Using black and white paper, create eyes as shown above that are slightly wider than they are tall and place on face.
7. For tail: cut a long strip, about 2" wide of pink.  Cut a long strip about 1/2" wide of red.  Using invisible tape, tape them together as pictured blow.  Then cut along dotted lines (about 1/2" thick) to create tails.
 
And you're done!  Have each kid write their name on their piggy tail and affix a small piece of tape to it.  Spin 'em around a few times, and see who gets the closets.  Enjoy the laughter the ensues.
 
Happy Minerafting,
Nicole

Thursday, June 11, 2015

Planting and Maintaining Tomatoes

The absolute minimum you need to do when planting using biodegradable cups is to remove the bottom.  Even though these cups are designed to biodegrade quickly, it still takes months, and will prevent the roots of your plants from expanding into the surrounding soil.  Just gently tear off the bottom, and loosen the roots.

Though many say it is not necessary to remove the remainder of the biodegradable material, I always peel as much off as comes off easily.  Sometimes the roots have begun to penetrate this layer and only small portions come off, but sometimes (as shown above) the entire casing will fall away when gently pulled on.  Again, just lightly loosen the outside roots. Then, simply plant in hole even with surrounding soil.
 
A few weeks after transplanting you'll need to start to sucker (or prune) your tomatoes.  You  may think that the more vines your plants grow the better, but this isn't the case.  Most tomato plants will continue to grow their vines through the entire summer.  All those vines take a lot of water and energy to maintain, and that's water and energy that won't be put into producing fruit!!

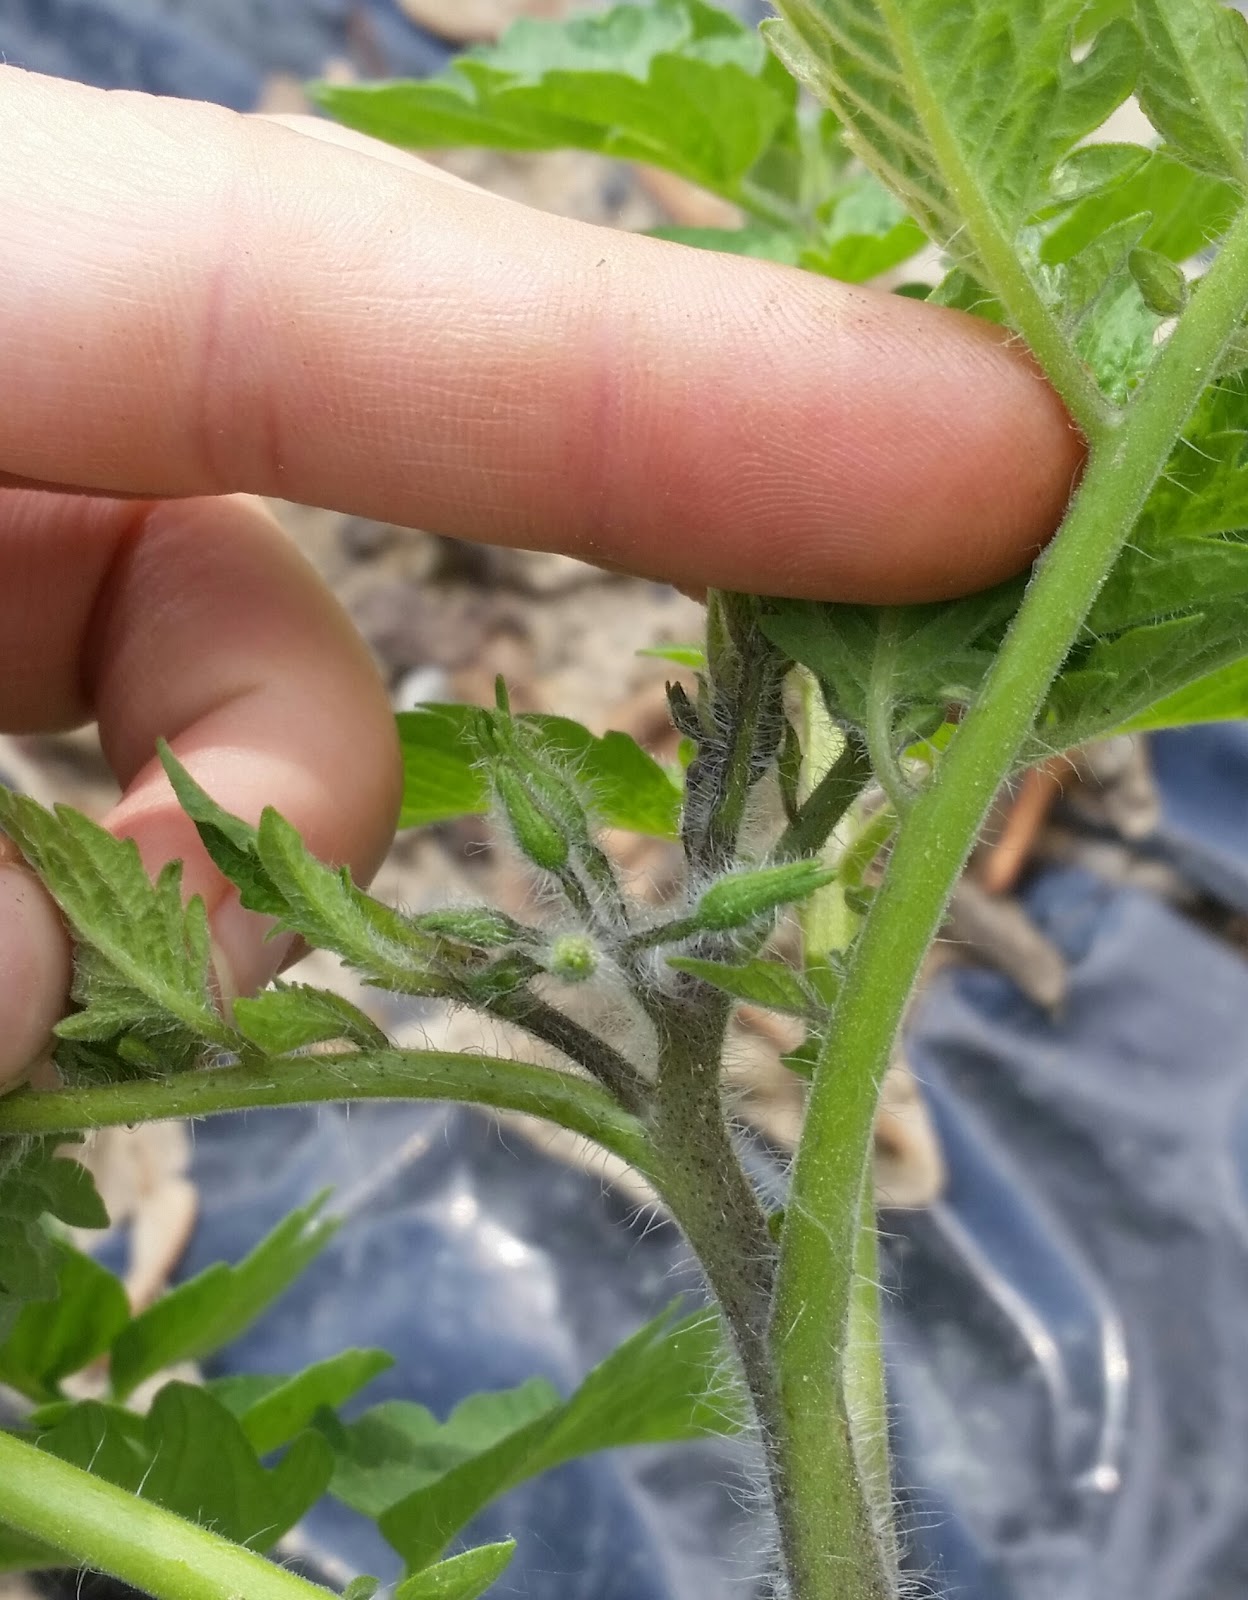
When 'suckers' form, so named because they suck production away from the fruit, begin plucking them off.  You can use small scissors, or just pinch them with your fingernails.  You'll know the suckers because they'll be small vine sprouts that form in the 'armpit' of the main stalk and auxiliary stems.

Be very careful though, because early blossoms and often look like these suckers and if you remove those as well you'll end up with a bare tomato plant!

As you can see highlighted in purple above, the suckers come directly out of the 'armpit' and have leaves exactly like the rest of the plant.  The tomato buds highlighted in orange, while close, do not come out of the armpit, and have small teardrop shaped buds. 
 
While it's best to remove the suckers early, do so ONLY if you're confident you can discern the difference between the suckers and the buds.  Otherwise, play it safe, and wait a week or two and the difference will be more noticeable.
 
Happy Gardening,
Nicole

Thursday, May 21, 2015

Laundry Detergent

I've been using homemade laundry detergent for over a year now.  AND I LOVE IT!  It cleans just as well as the fancy brands, and it's only fractions of the cost. 

The ingredient list:
1 Bar Fels Naptha Laundry Soap
1 Cup Borax
1 Cup Washing Soda
5 gallon bucket

How To:


Grate the Fels Naptha with a cheese grater into a saucepan and add water until the soap is just covered.  Bring to a low simmer and allow to simmer, stirring frequently, until soap is completely dissolved; about 15 minutes.


Meanwhile, fill a 5 gallon bucket about 1/4 - 1/3 with hot tap water and add 1 Cup Borax and 1 Cup Washing Soda and stir for a few minutes. 


When soap is completely dissolved, add to bucket and stir vigorously until mixture is smooth.  (Tip:  If you have the option, you can use a power drill and paint/cement mixer to make quick work of this part).  After the mixture is smooth, fill the bucket with hot tap water and mix again until smooth; it will go much faster this time. 

Allow the bucket to sit overnight to cool.  Mix one final time and divide into jugs if desired.  The mixture will need mixed periodically to prevent it from congealing.  (Tip:  I use my old laundry soap jugs and only fill about 3/4 full so there's room to shake it up before each load of laundry).

The Cost:
Fels Naptha..........................................$1.50
Borax
   $4/9Cups...........................................$0.44
Washing Soda
   $3.25/6Cups......................................$0.54_
                                               Total:    $2.48/5gallons

Talk about saving some serious money!  A 5 gallon bucket lasts my family of 5 for about 3 months.  In that same 3 month period I could easily spend $30-50 on laundry soap (or more) depending on the brand.  I love this stuff, and I hope you do to.

Nicole
 

Wednesday, May 6, 2015

Starting Tomato Seeds

Tomatoes like to be started indoors 6-8 weeks before being transplanted outside.  Here in northern Ohio, we can begin plating in our gardens sometime between May 1st and May 15th, depending on expected frost for the season.  That means I usually sow my seeds in mid-March.  It's tricky, because if you plant your seeds too early, your plants will grow too large before you can transplant and you cannot provide enough sunlight for them to thrive, but plant too late, and your harvest season is significantly cut short if there happens to be early frost.  For that reason, I usually do 2 plantings, about 2 weeks apart, and choose those that are largest and heartiest at planting time.

You can start your seeds many ways but there are two preferences for me.  Above, I've started them directly into disposable plastic cups.  Start by filling them about half full with potting soil then sprinkle in 2-4 seeds and cover lightly with more soil.  Keep the soil moist, but not soggy.  When they first sprout they'll grow two long smooth leaves, just as the second set of leaves sprout (after about 2 weeks, as shown above) add more soil until it's just below the first set of leaves.  Your tomatoes will then stay in these cups for several more weeks until ready for transplant!

These seeds I started using my alternate method.  I first planted them in just a tiny bit of soil in an egg carton.  Just as the previous method, once they started sprouting their second set of leaves, they were ready for more soil, so I transplanted them into biodegradable cups.  Fill the cup half full, then simply use a spoon to scoop out your tiny seedling from the egg carton (soil and all) and place them in your biodegradable cups.  Add more soil until it's almost to the bottom of the first set of leaves.  Another couple weeks and they'll look like the plants pictured above.  Notice how the first set of smooth leaves are starting to turn yellow/brown and fall off?  That's normal!

Whichever method you chose to start your seeds, once they're about 6-10 inches tall, they're ready to be planted outside!  As you can see above, your plants will have formed several sets of large leaves, and they will range in color from deep almost purplish green, to a bright lively green.  If you've only planted mass market seeds, you're likely to see only the bright green leaves, but I have found the heirloom seeds I've been saving over the years come in a much greater variety of color. 
 
Check back soon for some tips for hardening and transplanting your tomatoes outdoors.  And also, some helpful advice for getting your plants to produce the highest yield possible, since that's what all this works been for after all!
 
Happy growing,
Nicole


Monday, April 6, 2015

Freezing Asparagus

When I was able to score 15 pounds of asparagus for $14, you know I was thrilled! 
 
This is the time of year when asparagus is harvested, so it's fresh and delicious.  It's only harvestable for a few weeks though, and outside of this short period, its extremely expensive.  So, I buy up a years supply, and freeze it at home!
 

First, trim your asparagus.  Some people prefer to bend and snap it, but I feel like that wastes more than necessary, so I just trim it past the dry, woody part.  Usually an inch or two, but it depends on the age of the asparagus stalk when harvested.

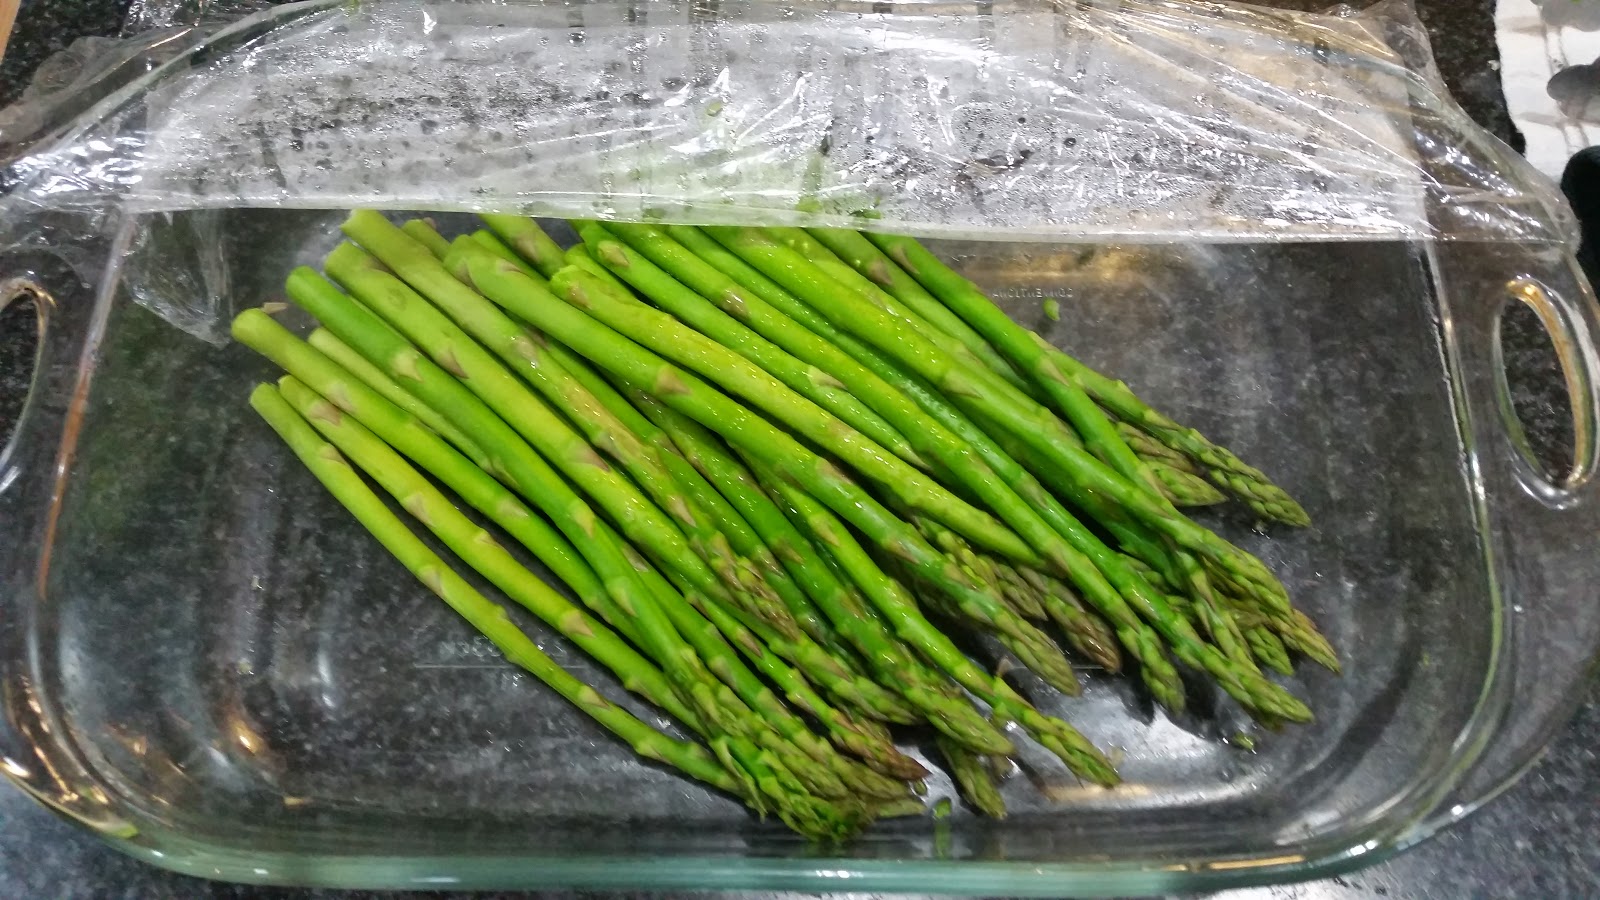
Then you need to partially cook the asparagus.  You can blanch it in boiling water a few minutes, but in my opinion it really leeches all the flavor and nutrition from the asparagus.  Instead, I place mine in a glass baking pan and cover with plastic then microwave for about 3 minutes for a medium to thick stalk. You'll notice they get very vividly green after just a couple minutes in the microwave.

After that, simply let them dry and cool on a dry dish towel, or paper towel if you prefer.

Last, place them in your preferred storage container and freeze quickly (avoid stacking them until fully frozen or it could take as much as several days for them to fully freeze).  Of course, a vacuum sealer would be ideal, but I have not made that commitment yet, so I use Ziploc style freezer bags.  If your stalks are shorter, they'll likely fit in a Quart size bag.  Mine were just a touch too long, so I froze 2 pounds in a gallon size bag, and left a small gap between each pound so I can easily remove one pound while keeping the other frozen for future use.  This comes in VERY handy for many frozen items.
 
Oh, and make sure to label and date your bags before filling!
 
Happy freezing,
Nicole
 

Sunday, November 16, 2014

Free Printable Recipe Cards

With the holidays on their way, I've been getting out those old family recipes.  I love seeing my mothers and grandmothers handwritten cards - but they're in very bad shape.  So, it's time for an update.  Here's a set of 10 vintage recipe cards, in 4x6 format.  (click each card to view large, right click large image to save)


Use these cards to store your own family recipes, or attach them to home cooked goodies as gift tags so your friends and family will be able to recreate your delicious treats.  

And, as an added bonus: Two of my favorite recipes!


Always a hit with my family.

Thanks,
Nicole